Support -> How To Cancel a Booked Appointment
How To Cancel a Booked Appointment
This guide will show you how to cancel a booked appointment from the calendar booking software.
Step 1. Enter the "Staff Day Planner" Section
After selecting the "Planners" tab in the calendar booking software, select the "Staff Day Planner" option.

Step 2. Select the Appointment You Want to Cancel on the Booking Calendar
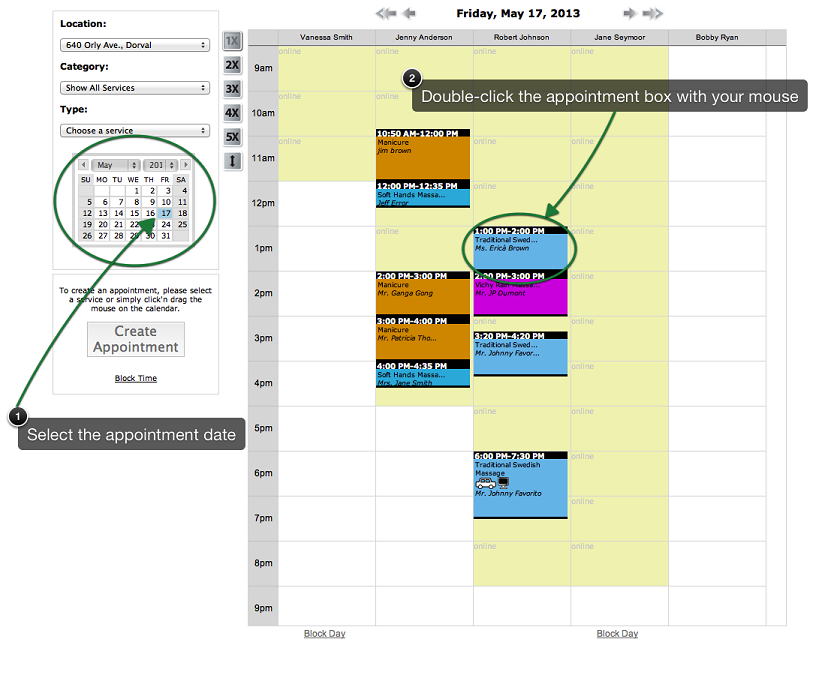
Find the date of the booked appointment by using the datepicker to the left of the interactive booking calendar.
The selected day will be highlighted in blue in the datepicker and the day's schedule will
appear to the right. You may also move to the correct date by using the arrows above the daily
schedule.
In the scheduling calendar, select the appointment you wish to cancel by double-clicking on the appointment box. The Appointment Details window will appear.
In the scheduling calendar, select the appointment you wish to cancel by double-clicking on the appointment box. The Appointment Details window will appear.

Step 3. Cancel the Scheduled Appointment
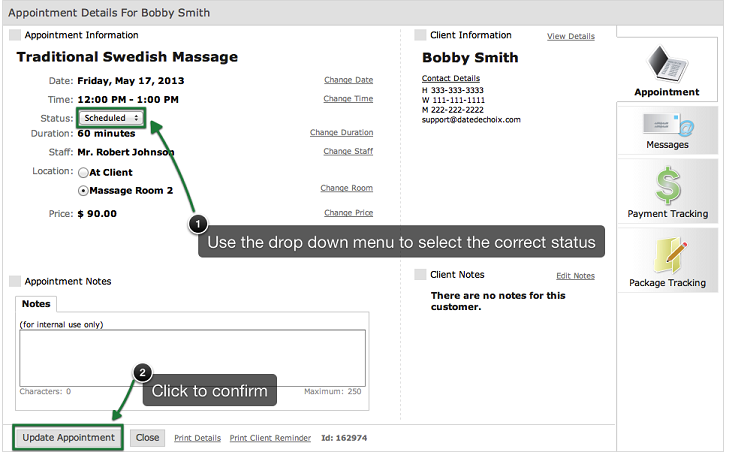
In the Appointment Details window, change the status of the appointment to "Canceled" by using the
drop-down menu next to "Status". Confirm the cancellation by clicking on the "Update" button. The
appointment box will disappear from the schedule and the time slot will be free for another
appointment. The time slot will also be available for booking in the customer portal depending on your
online scheduling rules.

NOTES:
a) After cancelling an appointment, you can be notified if any clients are currently on the
waiting list and their preferences correspond to the newly available time slot. This feature
simply needs to be activated in the Settings - Advanced - System section.
b) Clients on the waiting list can be automatically notified of the availability.
The system can block the time slot off after the cancellation and then send out
email requests to clients on the waiting list. This can also be enabled by accessing the
Settings - Advanced - System section.


