Support -> How To Edit Options for Notifications and Reminders
How To Edit Options for Notifications and Reminders
This guide will show you how to edit e-mail notifications and reminders within your appointment reminder software.
Step 1. Select the Service You Wish to Edit
After selecting the "Service" tab in the Settings page, under "View Services" select the service you wish to modify
and click on the corresponding "Edit" button.

Step 2. Edit Your Appointment Notification and Reminder Options
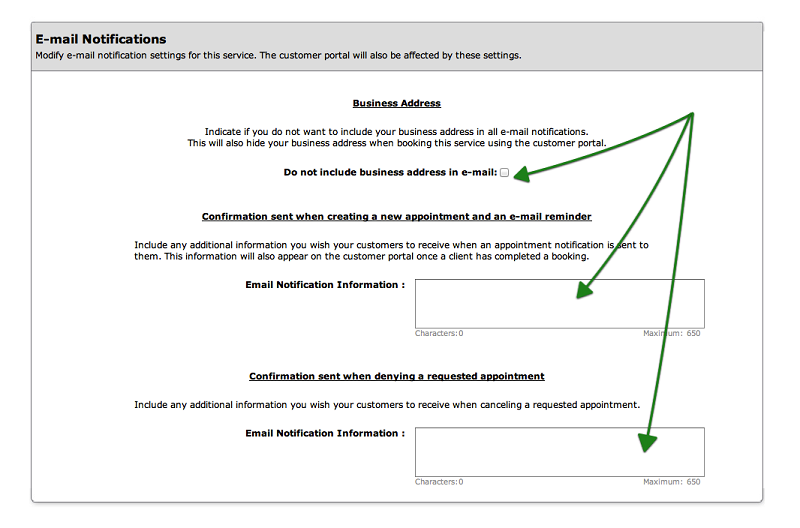
Scroll to the bottom of the form to view the E-mail Notifications section. This section allows you to configure emails that are sent out to
clients by the booking system for the following reasons:
- clients book an appointment online
- staff book an appointment internally using the booking calendars
- the system sends out automated appointment reminders

Step 3. Save Your Changes
Don't forget to click the "Save" button at the bottom of the page to confirm your changes.

NOTE:
If using the scheduling system in Requested mode, additional options will be available in the E-mail Notifications section that allows different text to be included in e-mail notifications for requested appointments. Once an e-mail is accepted, the above text will be included in e-mail notifications and reminders.
Additional text can also be included for e-mail notifications sent out when requested appointments are canceled. This is useful to include information about why the appointment may have been canceled.


